Code Compilation Process in Android.
from .java/.kt to .apk

Android Engineer at Mutual Mobile
When Learning any Technology it's really important to know the process/steps which take place to convert the written code( High Level Language) into machine understandable language (Binary Language).
Through the medium of this Blog I'll try to give an Idea about the process which includes the compilation of Java/Kotlin code to the formation Android Application Package (APK) or .apk file which is used by Android OS to install an app on the device .
1. Compilation of Java and Kotlin Code
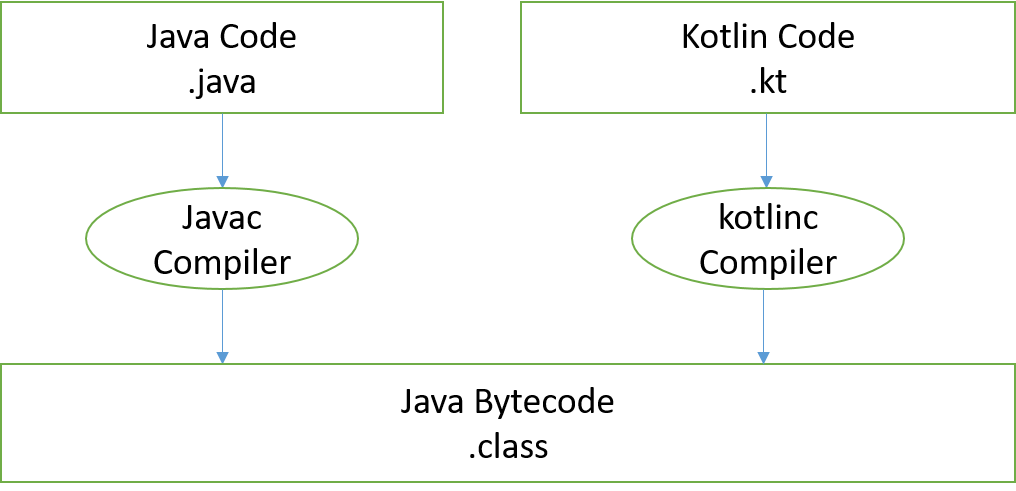
The .java and .kt source files are converted into .class files which contains java bytecode by the javac compiler and for Kotlin this task is done by kotlinc compiler. Bytecode is a instruction set defined for efficient execution by a software interpreter.
To see these generated .class files Inside your project directory go to app ->build ->intermediates -> app_classes
These .class files which contains bytecode are JVM (Jave Virtual Machine) compatible. But Android apps doesn't run on JVM instead they have their own runtime environment, before we proceed it's important to know about them.
From Android Version 1.0 to 4.4 DVM or Dalvik Virtual Machine was used which supported Dalvik Bytecode format (.dex).
The disadvantages of DVM was it's poor battery and app performance as it used JIT (Just In Time) approach in which the .dex bytecode was translated into machine code while app was running on the device and not before.
To overcome this ART (Android runtime) was introduced for .dex files which translated .dex bytecode to machine code at the time of installation also called AOT (Ahead Of Time). The disadvantage of ART was that though app performance was improved but the app installation time increased a lot.
Finally in Android version 7.0 a hybrid runtime environment constituting features of both JIT and AOT was introduced.
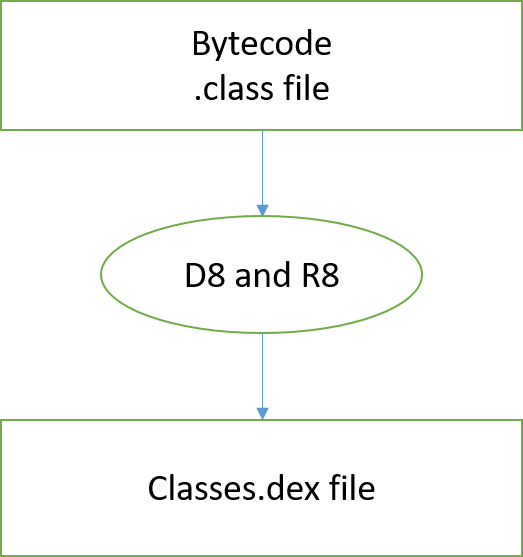
2. Formation of .dex files
The DEX compiler takes the .class files and converts them into classes.dex files. D8 from Android Studio version 3.1 onwards was made the deafult compiler, it produces smaller dex files for better performance. R8 further optimizes the bytecode.
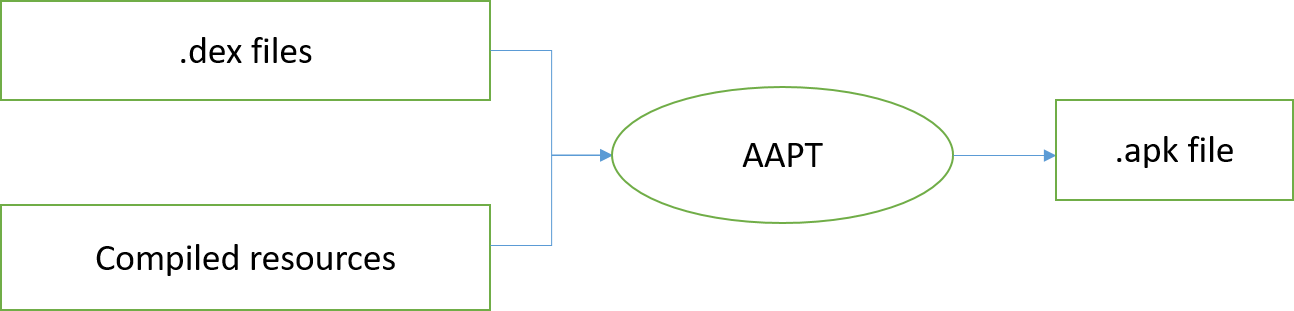
3. Generation of APK.
The Android Asset Packaging tool (AAPT) combines The generated dex files with the resources used by the app and outputs a .apk file:
We got the the desired file right? The process is done? The answer is NO, this generated .apk cannot be executed as it is not signed yet.
4. Generated a signed .apk file
If we want to build a debug version of the app then Android Studio signs it with a automatically generated debug keystore. Whereas if we are building a release version then you must sign it with a release keystore which you have to configure.
The APK Packager signs the .apk file and before generating the final APK, the packager uses the zipalign tool to optimize your app to use less memory when running on a device.

5. Visualization
On Android Studio Toolbar Click Build -> Analyze apk. Select the apk .
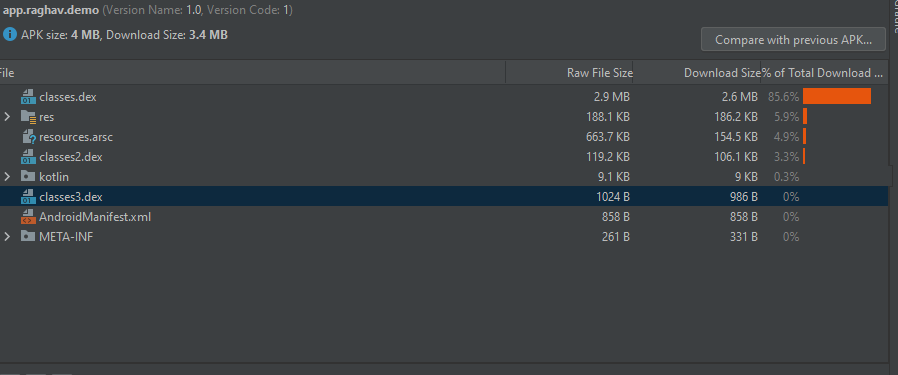
.dex files are Dalvik bytecode files as discussed above.
res folder consists of all the resources used by app.
AndroidManifest contains the information all the activity, fragment names. Permissions used and other configurations.
resources.arsc - generated by AAPT contains the indexes of all the resources wherever they are used in app.
This was all from my side, I hope you gained some knowledge from this Blog and if Yes, then any appreciation will be really great! Do comment if you have any queries.
Regards Raghav Aggarwal


